Similar to VLookup functionality in Excel, you can use a second data source to dynamically create a new group in a separate Tableau data source. Just follow along with this example to create one.
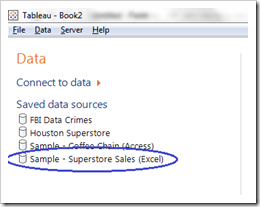
1. Open the Tableau included sample data source, Sample – Superstore Sales (Excel)
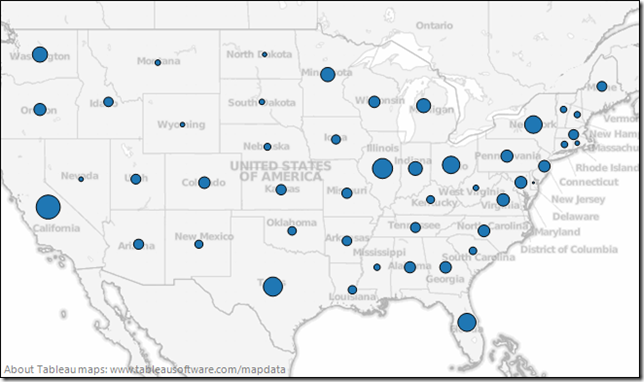
2. Map Sales by State: CTRL-Click on State and then on Sales. Click Show Me and select Symbol Maps. A map will appear.
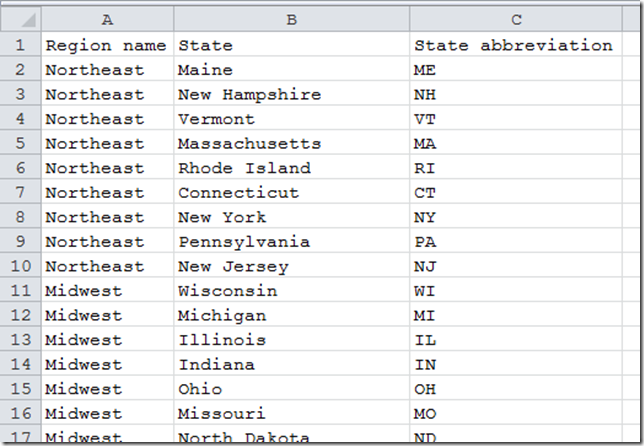
3. Suppose you would like to label each state by region and/or filter by region. If you already have a text file, Excel spreadsheet or database table with region data, you can use this for an Excel VLookup type of functionality. The example in this post (States by Region) can be downloaded here.
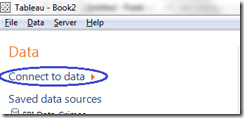
4. Connect to the second data source containing the lookup information. You will see that Tableau has opened the data source and automatically selected a linking field, State. If you add a field from this 2nd data source to the current view, it will combine data using the linking field State.
5. Double-click Region Name to add it to the view. It is automatically placed on the Level of Detail shelf at the bottom of the Marks card.
Now, if you hover over one of the State marks, you will see that Region Name is part of the view definition and available for various purposes such as review in tooltips.
6. After the last step, you are using the Region Name item via blending. To continue using this information, you must use blending in each view with Region Name. However, if you would like Region Name to be part of the original data source, you just need to issue one more request in Tableau.
Click on the Region Name item located on the Level of Detail shelf and select Create Primary Group from the drop-down menu for this item.
7. The Edit Group dialog appears. You will see that Tableau has taken the data from the second data source (Region Name in this case) and merged it with a new grouping field, State (group).
Additionally, you will see if there were any problems matching with states. You can use the native group functionality of Tableau to correct these problems or leave them as specified from the data blending.
Click OK.
Congratulations! You will see State (group) as a new data item in the Superstore Sales data source.
Note that this is a one-time operation. To update this grouping, you will need to repeat steps 6 and 7 in this article.
If you wish to completely remove the 2nd data source from this Tableau workbook, follow these steps:
1) Right-click on the Lookup region by state data source and select Close.
2) The new data item in the Superstore Sales data source, State (group), can be renamed by right-clicking on it and selecting Rename.
3) You will also need to re-add this item to your views where Region Name has been used.
Securely share R shiny apps
Develop R shiny apps
All on one dedicated, secure and powerful platform.


